Laminate Flooring
 If you’re after the timber look for your home but budget is a concern, laminate can be a fantastic option to get the look you want at an affordable cost.
You’ll find laminate easy to maintain and available in many different timber designs from the light to darker tones.
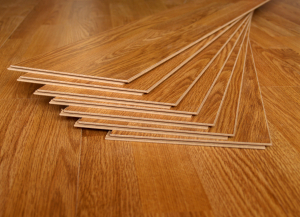
Just like timber, laminate is available in 1-Strip, 2-Strip and 3-Strip styles.
Laminate flooring is installed as a floating floor using the patented click system with no need for glue or long drying times.
Depending on the desired use, we offer a wide range in both 7mm, 8mm and 12mm (abrasion resistance levels AC3 and AC4), with anti-static features and high resistance to the spread of flame etc.
The whole range is built around a core panel made from moisture resistant HDF, with the edges wax sealed for greater protection.
With the wide range of designs and texture finishes available, you can find the ideal floor for any type of decoration or atmosphere, whether modern or traditional.
We also offer the full range of matching complementary items and accessories to ensure a perfect installation (underlay, installation tool-kit etc).
Installation Instructions
Before laying
Sub-floors:
All sub-floors must be prepared for installation in accordance with normal subfloor preparation procedures and to accepted tolerances within the flooring industry.
Check the sub-floors to see if they specifically meet the following requirements:
- Moisture
- Even (max. 3mm tolerance per metre)
- Stable and of sound condition
- Clean
Apart from screeds, PVC, linoleum, rubber and wooden sub-floors are perfectly acceptable, as long as the above conditions can be met.
Laminate flooring can also be laid on top of hot water underfloor heating.
For a special instruction leaflet regarding installation of laminate flooring on top of underfloor heating systems, please contact your supplier.
Laminate flooring is not suitable for installation on top of electrical underfloor heating.
Laminate flooring is not suitable for installation on top of textile floorcovering.
Basic Rules For Laying
- A 0.2mm damp proof membrane must be placed over the full area of all screeded and stone floors. Strips must overlap by at least 20cm directly under the joints.
- We recommend the use of a sound-proofing underlay. The strips should not overlap. With products that have an impact and room sound insulation incorporated, it is not necessary to have an additional insulating underlay. (The incorporated underlay does not replace the PE foil on stone sub-floors!)
- Laminate flooring should always be installed as a floating floor system.
- Boards must not be fixed to the sub-floor in any way (nailing, screwing, bonding).
- Short joints should be staggered by a minimum of 200mm.
- Always allow for expansion gaps of 8-10mm between the floor and all walls, units, etc.
- In all doorways, throughways and single rooms larger than 10 min length and/or width additional expansion gaps must be allowed for at these points and covered with an expansion profile.
Installation Guide
- Check all boards for possible damages/defects before installation.
Start installing the first row of boards in the left-hand corner of the room with both grooved sides of the boards facing the wall. Ensure the tongue section of the board is sawn off when they are facing the wall on the first row. Before you start the installation, place the expansion spacers against the wall. - Fit the boards on the first row together by lightly tapping with a hammer and tapping block (short side). Mark the last board in the first row to the required length (lay tongue to tongue), mark to size, then cut to size. Start the second row with the remaining piece of the board from the first row as long as it is at least 200mm long. The following rows will also be started with the remaining piece of previous row. Attention! Boards should always be staggered by a minimum of 200mm on the short joint.
- Click boards are installed in such a way that the tongue of the already installed panel engages into the groove of the new boards. In order to achieve this you have to evenly install the panel with the grooves facing the tongues of the already installed boards. Close it with a tapping block and hammer by means of light tapping. Always close the laminate flooring boards on the short side first and them on the long side from right to left. Always use an appropriate tapping block for the installation.
- You can now lay board after board, row after row. The last board of each row is installed in the correct position using a hook bar.
- In order to mark the last row of boards for scribing, take the new board and place it exactly on top of the row before last. Using an off cut of a board (element width and edge joint width) it is possible to transfer the wall profile to the board within a pre-chosen distance. Always allow for the minimum expansion gap when scribing along walls.
Fitting Around Pipes
- Measure the position of the pipes and mark it on the panel (allow for edge joint).
- Drill a hole at least 16mm wider than the diameter of the pipe.
- Saw towards the holes at a 45 degree angle.
- Fit and glue the sawn piece in place.
After Laying
- Attach felt protection pads to the legs of the furniture.
- Ensure heavy furniture is lifted when being moved.
- Furniture and chair castors should be of the soft castor type.
- Never submit your floor to wet cleaning only use a damp mop.
- Do not use abrasive cleaning materials.
- Do not sand or polish the floor.
- Contact your supplier for a more comprehensive guide to cleaning and care.